On one of the opening days of my summer study abroad session in Grado, Italy, my host “mom” (she was and is very young, and we both thought that term was funny), Susan, made homemade tortellini. It was one of my first tastes of Italy, and it was cheesy creamy pasta perfection. Later that week, I excitedly hovered over Susan as she prepared pasta for a lasagna she was going to make the next day. She made a mound of flour on the counter top with an indention in the middle, cracked a few eggs and began work on the dough. I watched her slowly and methodically knead flour into the ball of pasta for ten minutes or so, and I remember thinking that the process of making pasta seemed to be somewhat therapeutic.
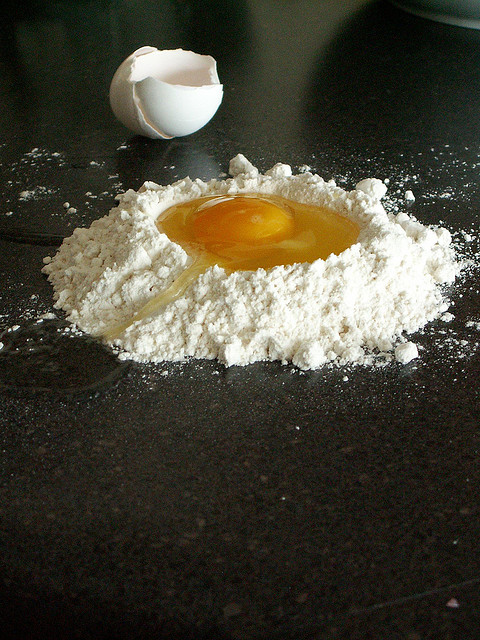
Almost two years later and an ocean away, I stood in my kitchen in Latta, South Carolina in front of a volcano of flour with a runny stream of egg-lava gushing out of a hole in the side and attempting to slide off of the counter. As I scrambled (no pun intended) to catch the egg by combining it with nearby flour (which only caused more egg-lava springs to pop up), I thought how very untherapeutic this was. Making pasta wasn’t quite as easy as Susan had made it look.

photo courtesy of Flickr.com
I discarded my first attempt–scraping it from the counter top, drawer handles and floor — but I wasn’t quite ready to give up (I had promised my mom and dad I’d make dinner). Looking down at the instructions I’d printed from the Food Network, now covered in egg yolk and a flaky semi-pasta-like substance, I exclaimed, “Alton Brown, I trusted you!”

Courtesy of imgur.com
Making some mental edits, I began again. This time, I patted the sides of my flour volcano to reinforce the structure so as to avoid another eruption of Mt. Egg Vesuvius. Instead of naively pouring all of the eggs into the well at once, I added one egg at a time and, unlike before, I found myself making the same calm and steady kneading motions that Susan had made two years before. I was falling in love with pasta making in the way I imagine you fall in love with someone whose flaws and downfalls you know and have accepted.
Pasta, once mixed, expresses its love for its maker by participating in the rest of the pasta-making process in a truly lovely and compliant manner. When I rolled the pasta out with my rolling pin and the smooth yellow surface didn’t stick to the counter top or the rolling pin, I had one of those moments of complete OCD fulfillment. This was no crumbling pie pastry or sticky cookie dough. Pasta was like no food I’d ever met–I mean–cooked before.
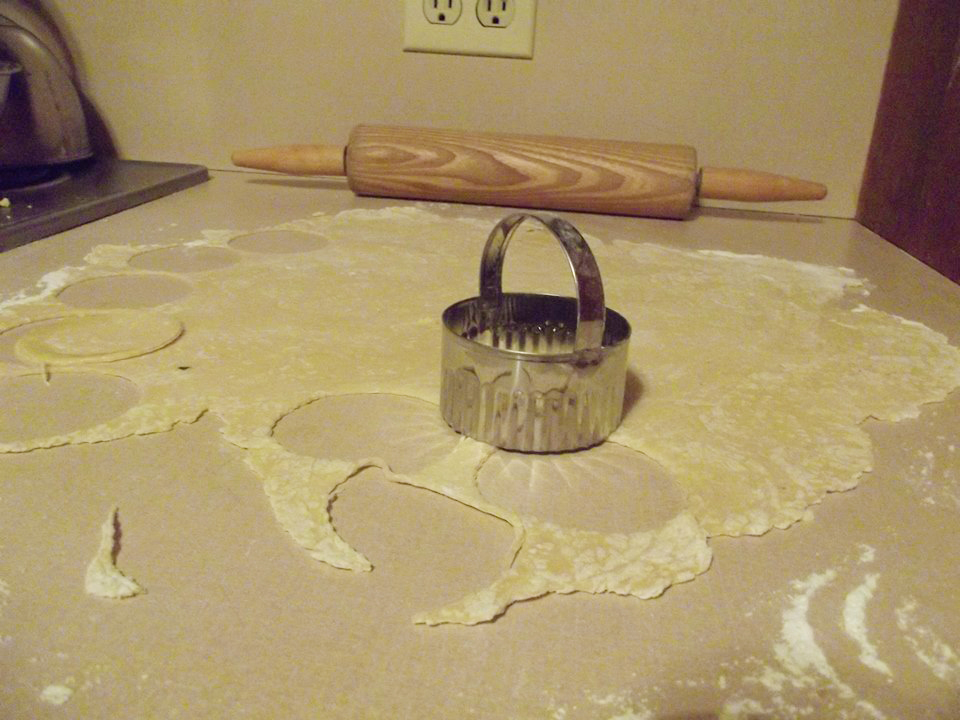
Sure, we had some tough patches. Every couple has their moments. Pasta and I had a bit of a falling out when I tried to cut circles out of it and it was so tough that it dented the handle of my biscuit round.
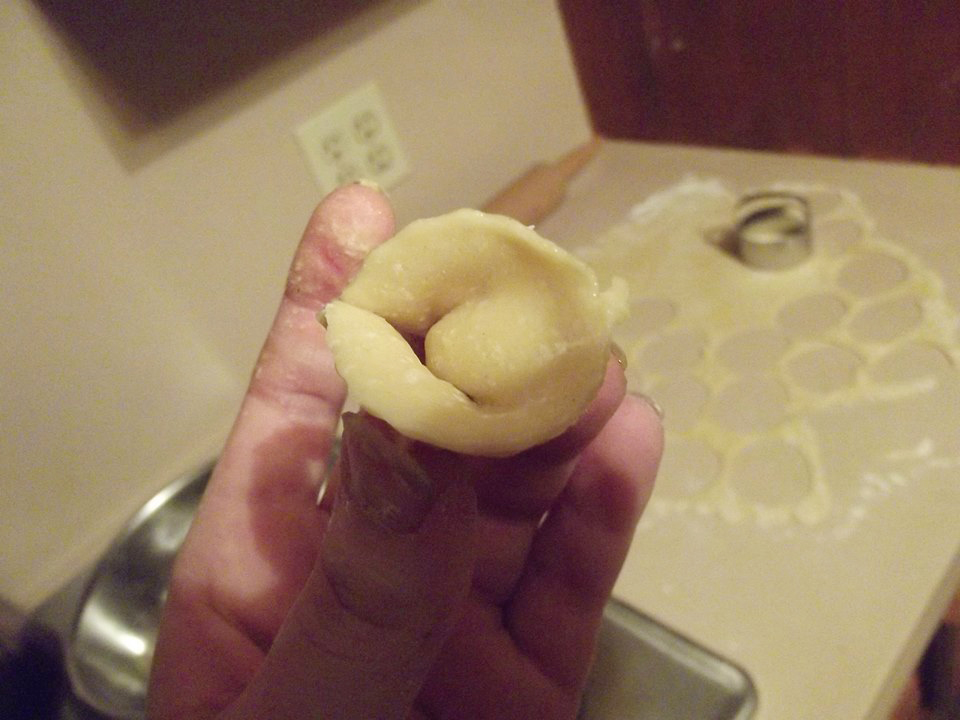
I put about a quarter teaspoon of cheese mixture in each round and then folded it. At this point, I knew that our relationship was truly symbiotic. I helped pasta grow and mature into the tortellini that I always knew it could be and, as I tasted the tortellini covered in a cream sauce that included the leftover filling, the tortellini renewed my faith in all things good and delicious.
It’s funny that tortellini and I experienced such a romance because, as legend has it, tortellini was inspired by romance. There are several stories about the origin of tortellini, but they all consist of similar elements. Basically, a devastatingly beautiful girl (sometimes the goddess Venus) walked into a tavern somewhere between Modena and Bologna, and the innkeeper fell in love with her. This love drove the man to peep through the keyhole of the woman’s door (I know–CREEPY!) where he was only able to catch a view of her naval. The innkeeper was inspired by the most beautiful belly button in the world and decided to create the naval shaped tortellini.
After a few hiccups, a dish inspired by lust and belly buttons, had made its way onto my dining room table and into my heart.
The Tortellini Recipe I Followed (with Some Helpful Hints for the Flour Volcano Challenged)
Courtesy of Alton Brown via Foodnetwork.com
Prep Time: 25 min
Cook Time: 5 min
Servings: 6-8
Ingredients:
1/4 cup grated Parmesan
2 tablespoons chopped spinach
1 egg
1/4 teaspoon fresh ground black pepper
1 pinch freshly grated nutmeg
Fresh pasta, recipe follows
1 egg mixed with 1/2 teaspoon water
3 cups all-purpose flour
2 large eggs
3 tablespoons water
1 teaspoon olive oil
1/2 teaspoon salt
Directions:
1. Make your flour volcano and reinforce the sides. Check for any holes or weak points in your structure.
2. Mix your egg, salt, water and oil. Add this mixture a little at a time. SERIOUSLY. A little at a time. Mix it into the flour with two fingers (or three…or four…I’m not sure why that matters).
3. If you’re going to roll the dough by hand, knead it in the flour for 8 to 10 minutes. Don’t force the dough to take all of the flour. Be calm and roll with it like the Italians. Then let the dough rest in the fridge for an hour.
4. In a bowl combine all ingredients, except for the pasta and egg wash.
5. Roll dough to desired thickness. Cut the dough into 3 or 4 inch rounds with a cookie cutter (or a biscuit round). If your cutting device has a thin metal handle and you like said cutting device, press around the edges of the circle shape rather than using the handle.

Photo by Katie Scarlett Stoops
6. Place 1/4 teaspoon of the filling into the center of each round. Alton is right about this. 1/4 teaspoon seems like nothing but if you add any more than that, the tortellini won’t fold correctly.
7. Brush egg wash on the bottom half of the round and fold over to seal. You can be liberal with the egg wash. It won’t hurt anything and you’ll most likely still have some left over when you’re done.

photo by Katie Scarlett Stoops
8. Alton says to “fold back around your finger and turn down the edge to form a tortellini” but this won’t work unless you have inhumanly tiny fingers. Just fold the pasta in half by touching the two corners of the semi-circle filled pods together and then help the lip of the pasta to do what natural forces want it to do. If it looks like tortellini when you’re done, you’ve got it. Don’t be afraid to improvise.

Photo by Katie Scarlett Stoops
9. In half a gallon of rapidly boiling salted water add the tortellini in batches. Cook for 3 to 5 minutes, or until they float to the surface. Remove to a strainer to drain. (But really, they’re going to float to the surface in about 30 seconds). Unless you want chewy tortellini, let them cook the full 4 or 5 minutes. They won’t burst open. I promise.
10. If you want a cream sauce to go over the tortellini, add a little EVOO to a sauce pan with about a cup of milk at medium heat. Stir it constantly and when it starts to get warm, add in two or three tablespoons of self-rising flour. Whip in the flour gently and when the substance in the pan starts to feel thick, you can add in the rest of your filling or any other cheeses and spices you want to try.

