Pour, wait, light, fail. Pour, wait, light, see a flame, wait, fail. This was how the leaders of my pre-orientation were attempting to light a charcoal barbecue.
I was wondering why our food was taking so long when I saw a group of four to five upperclassmen and alumni struggling to light it. We were at basecamp during a wilderness trip—it was the last day and they were trying to set up for an alumni meal.
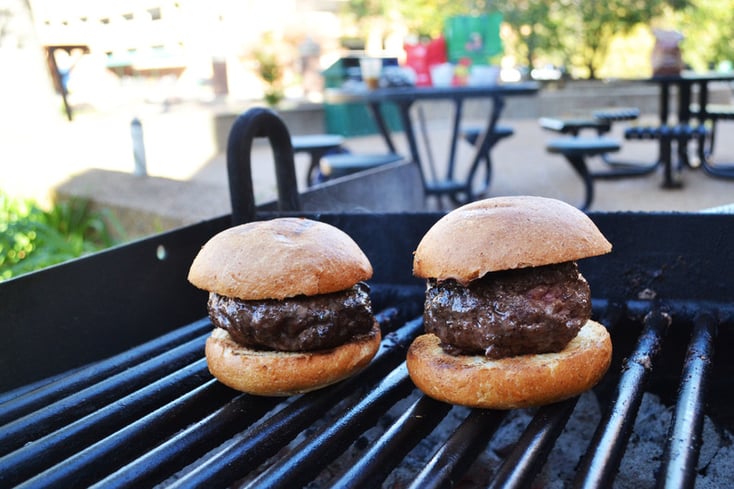
I went to see what was going on and I noticed that only one of the leaders/alumni had ever lit a charcoal barbecue before, but he hadn’t done it in a while. So I, a not yet matriculated freshman, walked over and offered to help. They handed me the bottle of lighter fluid and a lighter and I got the charcoal barbecue lit in a matter of seconds. Then I proceeded to make over a hundred hamburgers (read: see my recipe below) and hot dogs, and from that moment on, I was known as the grill master.
Here are my tips and tricks for becoming a master as well, since grilling on campus isn’t as intimidating as you might think.
What you’ll need to prepare the grill

Before grilling you’ll need to purchase charcoal briquettes, lighter fluid, a lighter, a grilling brush, a grilling spatula and/or tongs, and pam cooking spray. Check out the recipes in this article to see what ingredients you might need for your actual food as well.
Set up your charcoal

The first step is to put a pile of charcoal in the grill. The type of charcoal that you use is up to you, but I wouldn’t recommend the match-light ones since you end up paying more for less charcoal. If the grill that you’re using has a removable section where you put the charcoal, place that section on top of the grills grates. Otherwise, just remove/open the grates.
Light the grill

Second, cover some of the charcoal with lighter fluid (here’s an alternative way to light a charcoal barbecue) and then light it right away. Take a step back, and every time the flame is about to go out, spray it with more lighter fluid so that there is an uproar of fire above the grill. Always be cautious when you add lighter fluid, since the fire can flare upwards unpredictably and burn you. Continue to add lighter fluid and heat up the grill until the charcoal all around the grill is lit. Once some of the charcoal is lit, you can more easily spread the fire using the lighter fluid.
The charcoal is ready for grilling when the fire has died down, but there still should be a flame when you spray the embers with lighter fluid. The charcoal should also be a white-ish color.
Finish preparing the charcoal

The third step is to even out the ready charcoal. You can do this either by shaking the container it’s in if your grill makes this possible, or by using a grill brush or stick. Evening out the charcoals is important since it will help to evenly disperse the heat throughout the grill.
If you put your charcoal on top of the grill in the beginning, move it under your grates, or close the grates over your charcoal. Let the heat of the charcoal clean the grates before cooking, or if you have a grill brush, this is the time to use it.

Lastly, spray the grill with Pam before you start cooking. Now that your grill is ready to go, it’s time to get cooking. Below are two of my favorite recipes, but there are so many options when it comes to grilling that you should try these recipes as well.

Basic Hamburger Recipe
Ingredients
Instructions

Break up the ground beef into smaller pieces.

Lightly shape together your patties using your hands. Try not to over-compress the patties, compress them just enough so that they don’t fall apart. You can make the patties as big or as small as you want to. Remember to heavily salt and pepper the burgers.

Cook the patties until the bottom looks completely cooked. This should take about five minutes. Next simply let the burger cook, only flipping it if it looks like it might burn. Try to limit how many time you flip the burger. Cook your burgers to your desired temperature (I recommend medium rare). The cooking time depends on how big you make your patties.
With practice you’ll be able to tell when your burgers are ready just by touching them. You can use the area between your thumb and pointer finger to gauge how cooked the burgers are. The softest part (at the top if you’re looking between the two fingers) is equivalent to rare, and as you slightly move down it gets more and more cooked.

Once your burgers are just about ready, put on the cheese and toast your buns on the grill.
#SpoonTip: Replace regular hamburger buns with fresh ciabatta buns if the supermarket closest to you carries them. If not, try out a local bakery and have them cut up a loaf of ciabatta into buns for you.

Take off your burgers off and enjoy.

Simple Tandoori Chicken Recipe
Ingredients
Instructions

Put the chicken in either a large bowl or two smaller bowls.

Pour the yogurt over the chicken and then cover the top of the yogurt with cajun seasoning. Mix everything together so that the chicken is evenly seasoned.

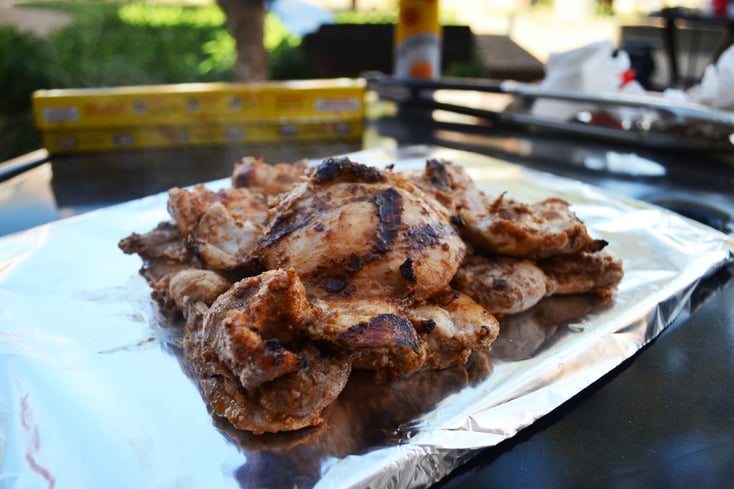
Grill the chicken for a couple of minutes, then flip it once it has browned. Continue to flip so that the chicken doesn’t burn or stick to the grill. Cut into the chicken before taking it off the grill to make sure that it is completely cooked through.
Grilling is an easy and affordable way to make food on campus once you’ve mastered the skill. Everybody around you will look at you with awe as you play with fire with ease, and then feel jealous when they see you eating food that smells better than a restaurant. Now with this information under your belt, you too can become the grill master in your friend group.


