I used to only dream of eating sushi whenever I wanted and without having to go to a fancy, expensive restaurant to get it. So I tried to figure out how I could make it at home for cheap. But every sushi making video only showed how to make sushi with a bamboo mat. Technically, I could have bought a bamboo mat online and waited weeks for it to arrive, but at this point, I was desperate. The more I searched, the more I wanted some sushi. I couldn’t wait anymore. I was about to give up and order sushi from a restaurant, but then I stumbled upon the secret to making sushi without a bamboo mat. Ever since I have been making sushi at home easily, saving tons of money and time. And now you can too.
How Sushi Is Typically Made
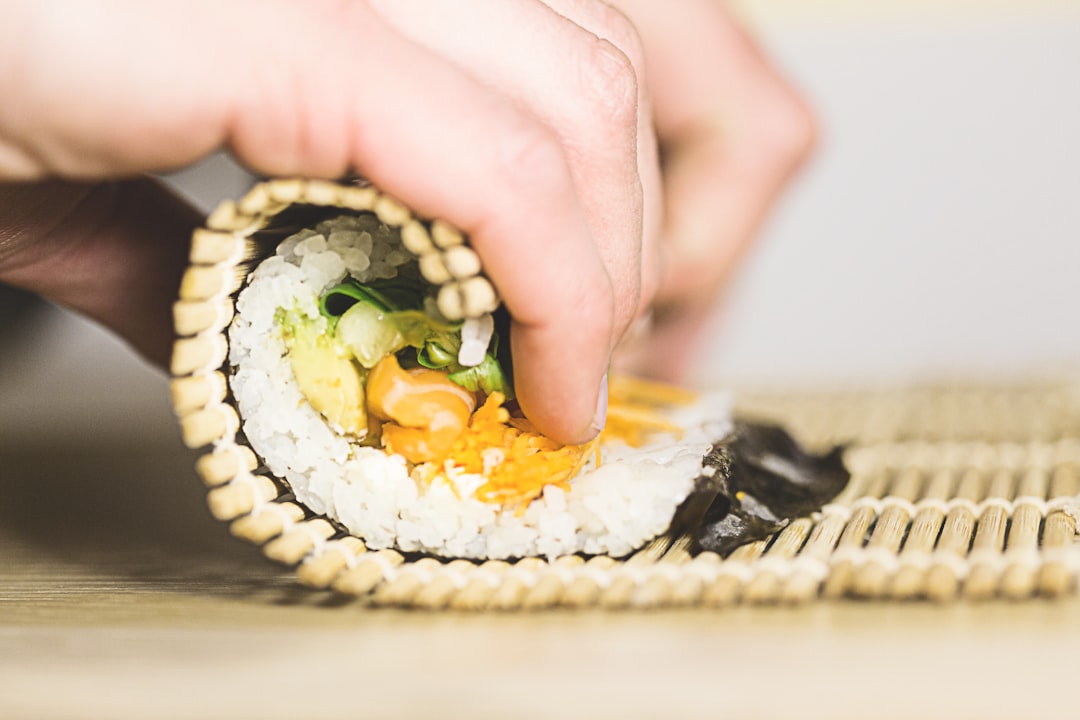
Knowing how to make a sushi roll the traditional way is essential to understanding the technique used to make sushi without a bamboo mat. Typically, sushi is made by layering and assembling the sushi elements on a flat surface and then using a bamboo mat to roll it into a sushi roll as seen in the image below. This technique is used in many traditional restaurants serving sushi. It requires a wooden bamboo mat, but sometimes plastic rolling mats that appear similar are used.
Everything You’ll Need to Make Sushi Without A Bamboo Mat
Now knowing the typical sushi roll making process, you are ready to ditch the fancy equipment and easily make your own sushi at home. Everything you’ll need is probably already in your pantry and kitchen cabinets.
Here’s everything you’ll need to make your own homemade sushi without a bamboo mat:
The Equipment:
-Dish or hand towel
-Plastic Wrap
The Sushi Roll Ingredients:
-Short grain white rice
-Sugar
-Seaweed sheets or snack sheets
-Your choice of filling (I used vegetables: cucumber, avocado, bell peppers, and carrots)
And that’s it! Once you get your equipment, now it’s time to get started!
How to Make Sushi Without A Bamboo Mat
First, you will cook your rice. Add short grain rice to a pot at a 2:1 ratio of rice to water (2 cups of rice and 1 cup of water for 3-5 rolls of sushi). Then, add 2 tbsp of sugar and a dash of salt. You can also add 1 tbsp rice vinegar, but this is not necessary.

Next, you will want to prepare your sushi roll filling. I decided to make a vegetable roll so I thinly sliced cucumbers, avocado, red bell peppers, and carrots. Make sure whatever you add will be able to fit into a regular-sized sushi roll. In other words, start with small amounts and add more later if it fits.

Now it is time to layer and assemble your sushi roll. First, set up your DIY sushi mat. Fold your dish towel in half and lay it on a flat surface. Next, cut and place a sheet of plastic wrap the size of the dish towel on top of the dish towel. Now, add your sushi ingredients starting with the or the seaweed sheets depending on how you like your sushi roll. The first item placed down will be the outermost part of the sushi roll. I started with the rice and spread it down flat into a rectangular shape as seen below. Then I added the seaweed sheet. But you can do this the other way around as well.

Now, you add your filling. As seen below I added my vegetables in one by one.

Once you have added all your filling it’s time to roll.

Lifting the part of the towel and plastic wrap closest to you, roll the end of the sushi roll into the middle of the sushi roll. As seen in the video, roll the sushi by rolling over the wrap and also separating the rice from the plastic wrap at the same time.

Now you have finished tolling. Slightly place pressure to ensure that your sushi roll is solid and held together before removing all the wrap.

Now your sushi is done! You can cut and immediately serve!

Look how beautiful it turns out! Choose your favorite sushi roll, make it, and enjoy! It tastes great with some soy sauce or eel sauce! Have fun!


