


Granola. Hearing that word might conjure images of Vermont, hiking and fit people wearing vests and LL Bean boots…or maybe it doesn’t. But it probably does make you picture being healthy and nutritious. While granola can be good for you, most store-bought granola is laden with added sugars and excess fats.
Skip the packaged granola and make your own with this recipe below. Having control over the ingredients lets you decide how much sugar or fat you actually want to add. While this recipe is for a simple granola, you can add other ingredients to fit your tastes, whether it’s gingerbread (if you’re in the holiday spirit) or pumpkin spice (for when you’re feeling a little basic).
Although nuts and seeds raise the fat content of the granola, I add almonds, chia seeds, flax seeds and sunflower seeds because they contain monounsaturated, or “healthy” fats, which are important for a balanced diet. Not only that, but nuts and seeds also add protein to the granola.
Prep Time: 5 minutes
Cook Time: 10 minutes
Total Time: 15 minutes
Servings: 8 (based on ¼ cup serving size)
Ingredients:
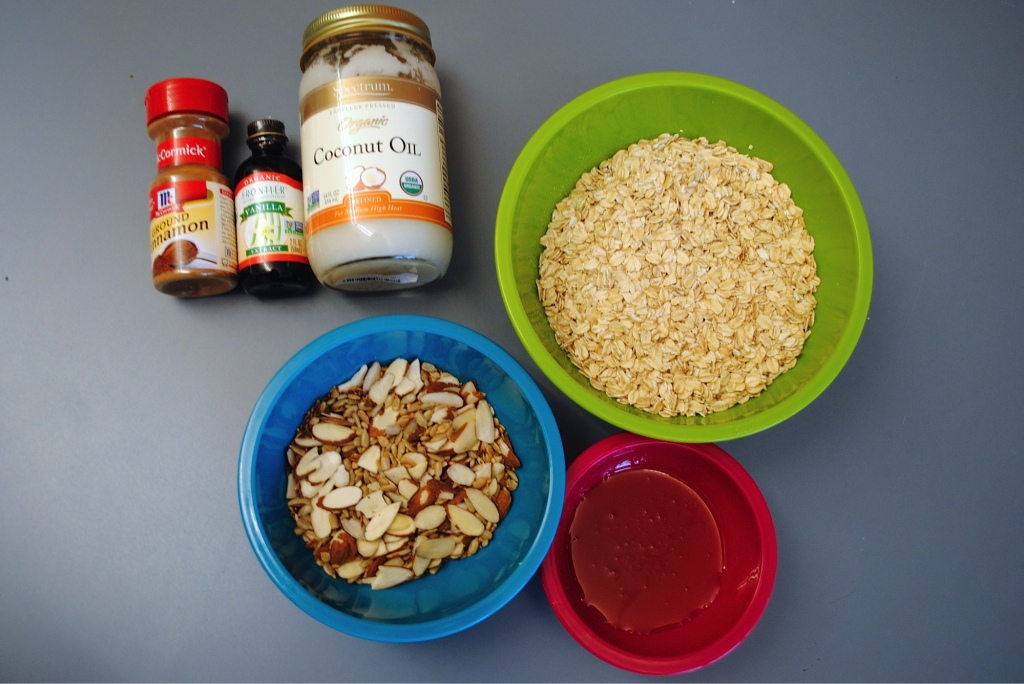
Photo by Sydney Segal
2 cups rolled oats (regular or old-fashioned, not instant or quick)
2 tablespoons coconut oil (vegetable or palm oil can be substituted)
2 – 3 tablespoons honey
1 teaspoon vanilla
2 – 3 teaspoons cinnamon (or as much or little as desired)
Optional add-ins:
¼ – ½ cup nuts
¼ – ½ cup seeds
¼ – ½ cup dried, chopped, unsweetened fruit
Directions:
1. Preheat oven to 300ºF.
2. Melt honey and coconut oil together. Coconut oil at room temperature is solid, so you’ll need to melt it for a few seconds in the microwave.
3. Thoroughly mix oats, nuts, seeds, fruit, cinnamon, vanilla and oil-honey mixture together in a large bowl with a spatula.
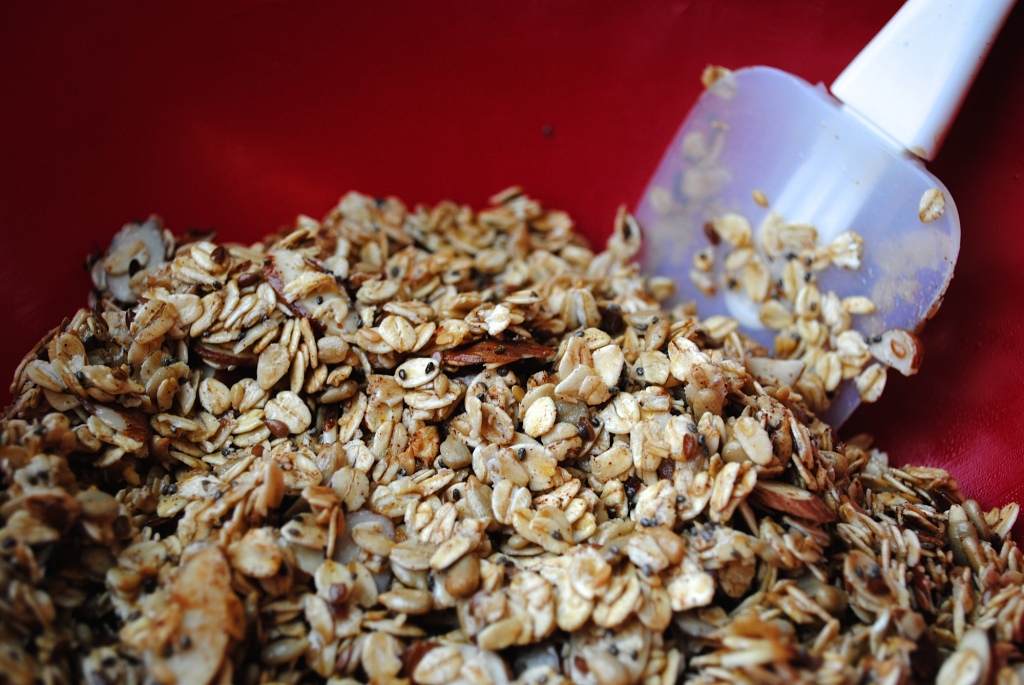
Photo by Sydney Segal
4. Spread onto a cookie sheet in a thin layer, no more ¼ – ½ inch thick.
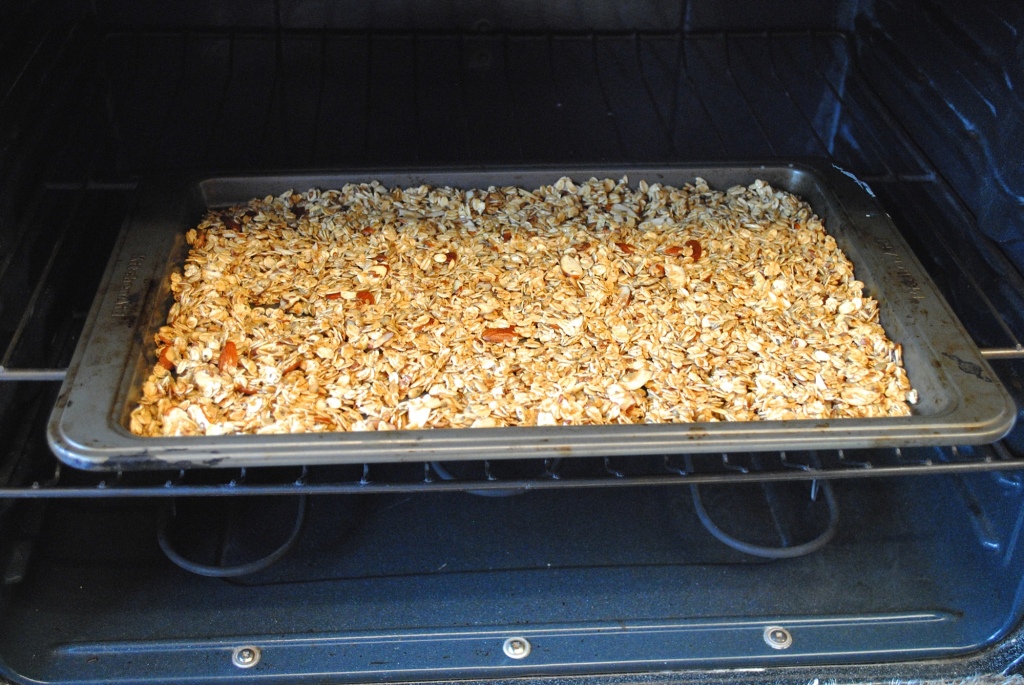
Photo by Sydney Segal
5. Bake for 10 minutes, or until granola is lightly browned and fragrant. Take out sooner if you like softer granola, or a little bit later for a crunchier texture. Don’t leave it in for too long, or the granola will burn.
6. Let cool and store in an airtight container.
7. Enjoy!
Still craving more granola? Want to know what to do with it now that you’ve made it?