


While browsing the internet, you’ve probably seen the zebra cake before. On the outside it looks like a totally normal cake: the surprise is when you cut into it and it’s zebra print. “How in the world does that even happen?” you’ve probably wondered. Well, wonder no more! Making a zebra print cake is surprisingly easy, and can even be done with cake mix (sold conveniently at both Vittles and Wisey’s). This cake is perfectly unassuming from the outside, but you’ll be sure to impress everyone once the first slice is cut!
For this recipe, you’ll need two different batters, one chocolate and one vanilla. If you’re not a fan of the chocolate-vanilla combo, you can get the same effect by using all vanilla batter and dying half another color. This method could also work with three colors or other flavor combinations.
A word of advice: make sure the two recipes/mixes that you choose have very similar baking times and oven temperatures. If you select a batter asking for 25 minutes in a 325°F oven and another asking for 30 minutes in a 350°F oven, one part will either be under or over baked, and you definitely don’t want that!
If you’re using mixes, buy both from the same company and double check the times and temperatures to ensure they are relatively the same. If you’re making the batters from scratch, make sure to check cooking times and oven temperatures. You could also add about a 1/2 cup of cocoa powder to half of the vanilla cake recipe for the chocolate half to make things simpler.
Prep time: 10 minutes
Cook time Dependent on the recipe/mix used, generally about 20-25 minutes
Total time: 35 minutes
Ingredients:
One recipe/mix of vanilla cake, prepared
One recipe/mix of chocolate cake, prepared
Directions:
1. Preheat the oven to the temperature on the box(es) or in your recipe(s). Grease and flour (or spray) two 9-inch cake pans.
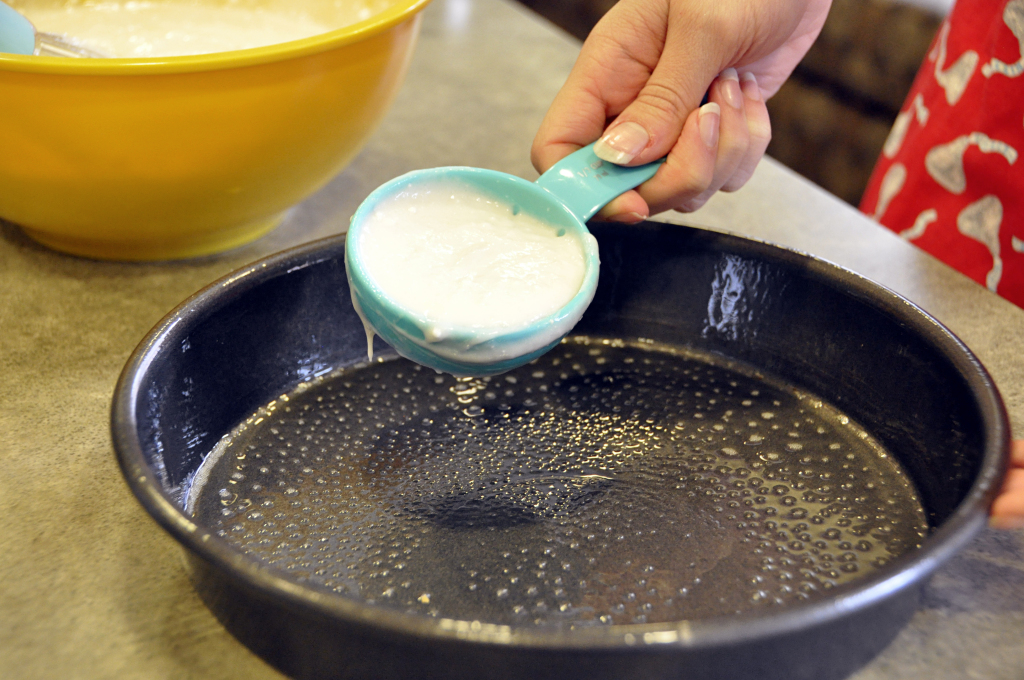
Photo by Emma Delaney
2. Pour 1/4 cup of the vanilla batter into the center of the first pan.
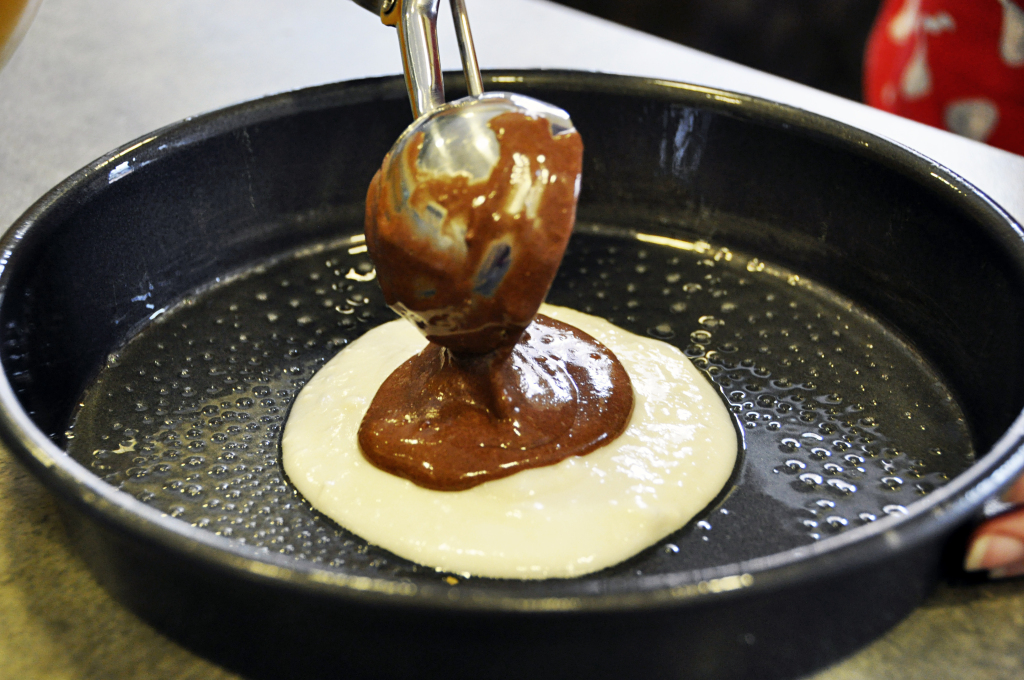
Photo by Emma Delaney
3. Pour 1/4 cup of the chocolate batter into the center of the first vanilla circle.
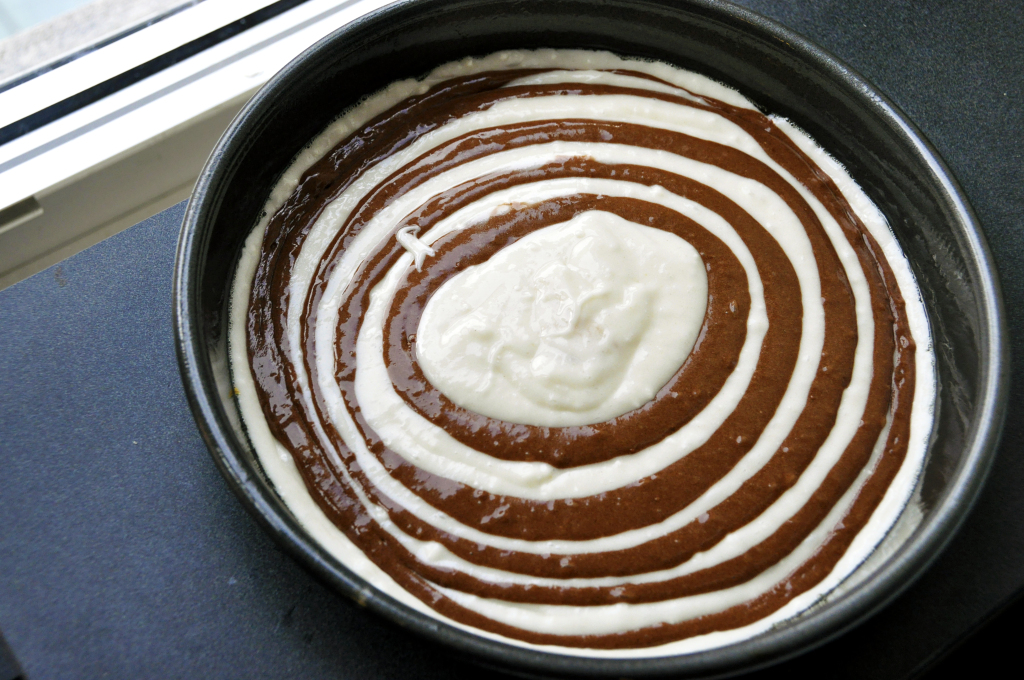
Photo by Emma Delaney
4. Continue the pattern, alternating back and fourth until half of the batter is used and the pan is full. By pouring each 1/4 cup in the center of the previous circle, the batter will push out to the sides. This will create concentric circles out to the edge. (It’s okay if your circles aren’t perfect; you can’t tell in the end.)
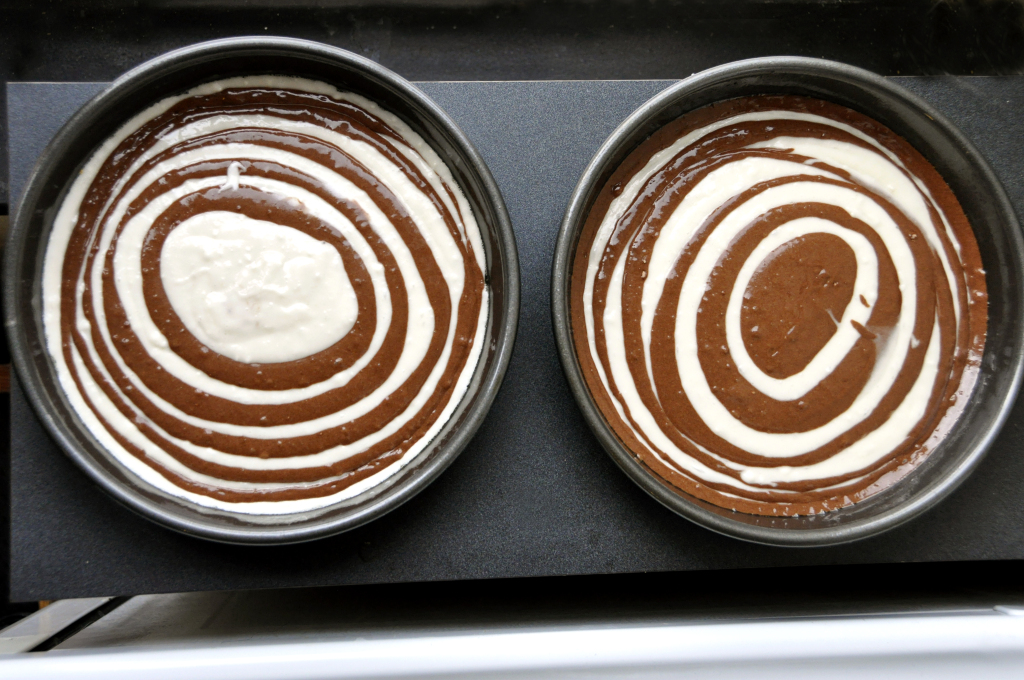
Photo by Emma Delaney
5. Repeat steps 2-4 with the second cake pan.
6. Bake according to the directions of your recipe.
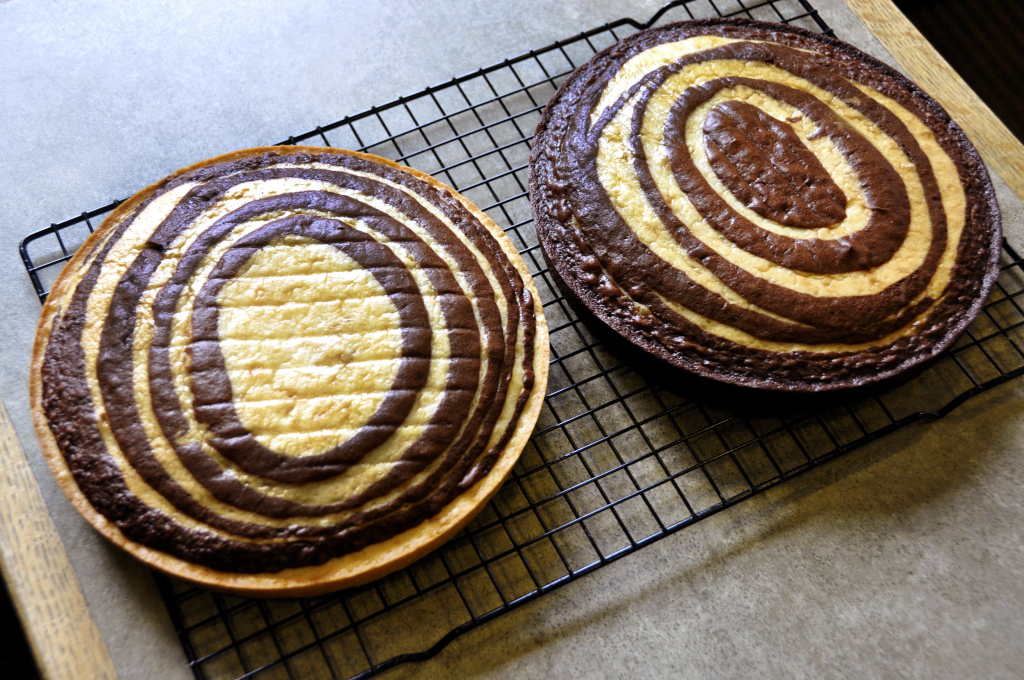
Photo by Emma Delaney
7. Remove them from the oven and cool the layers on a cooling rack.
8. Using a knife or a cake leveler, cut the domes off of the tops of the cakes. (This is an optional step; it’ll help your layers stack better, but isn’t necessary, especially if your cakes already have relatively flat tops.)
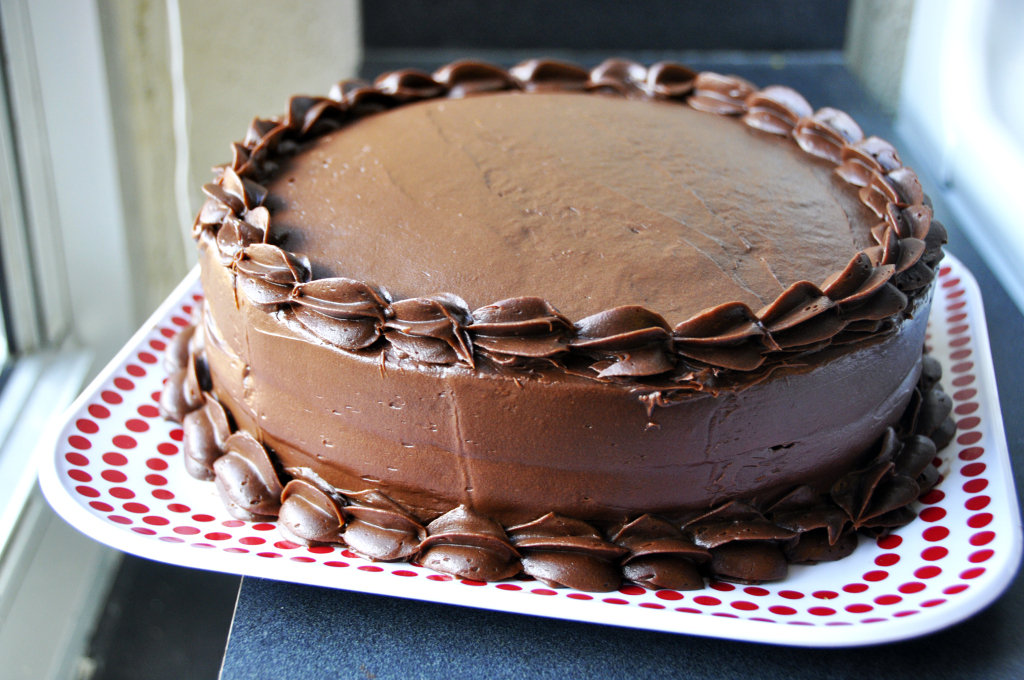
Photo by Emma Delaney
9. Frost and stack the cakes according to your liking.
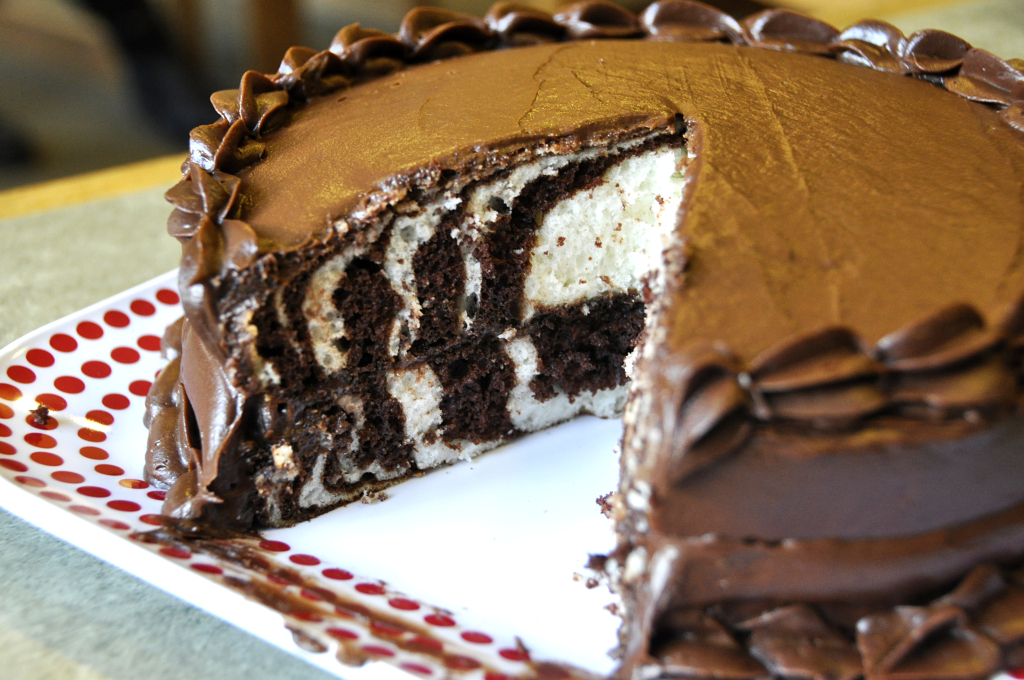
Photo by Emma Delaney
10. Cut the cake and watch everyone be very impressed!