


Milanos are the cookie we turn to when we want to feel a little more classy and a little more international (Italian-ish) than a regular ol’ chocolate chip. But there was always something a little disappointing about the store-bought kind.
Maybe it was their perfectly uniform shape that told you “no human hand touched these” or the always-too-little amount of filling. Well, now you will never have these concerns again: get ready for a homemade Milano that knocks even the best one available in stores out of the running.
The twist in these cookies is the subtle fruit flavor, thanks to a bit of lemon juice and orange zest. It’s a refreshing contrast to the bittersweet chocolate, but still doesn’t overpower the buttery, vanilla flavor goodness of the cookie.
And if you’re one of those people who’s always thought the middle ganache layer was the best part, well then you can go ahead and slather on that filling. These cookies can go above and beyond all of your Milano wants and needs.
Just like the (lesser) Pepperidge Farm originals, be prepared to not be able to eat just one.
Prep Time: 30 minutes
Cook Time: 60 minutes
Total Time: 90 minutes
Servings: about 2 dozen sandwich cookies
Ingredients:
12 tablespoons unsalted butter, at room temperature
2 ½ cups powdered (confectioner’s) sugar
6 egg whites
2 teaspoons vanilla extract
½ teaspoon fresh lemon juice
½ – ¾ teaspoon freshly grated orange zest (depending on taste)
1 ½ cups all-purpose flour
8 ounces bittersweet or semi-sweet chocolate (I used 60% cacao chocolate chips)
½ cup heavy cream
Directions:
1. Preheat oven to 350°F. Line baking sheets with parchment paper or grease with cooking spray.
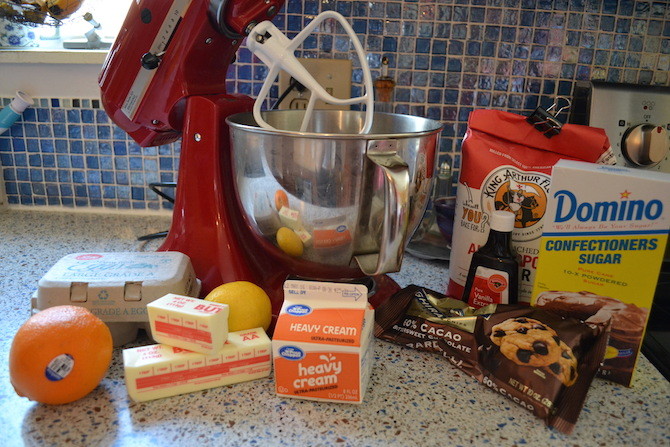
Photo by Rae Steinbach
2. Cream together butter and powdered sugar until smooth and creamy, about 3 minutes.
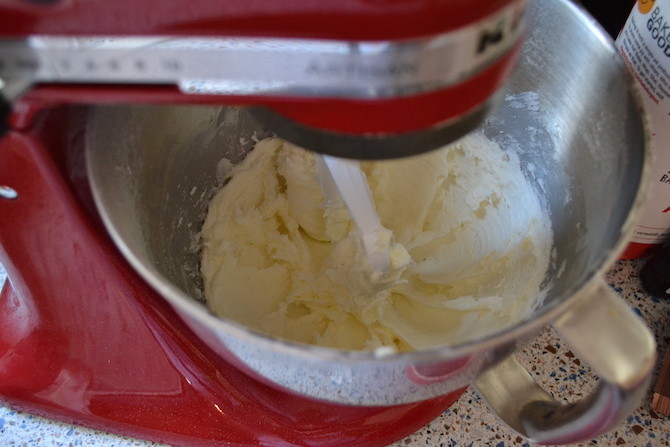
Photo by Rae Steinbach
3. Add egg whites, one at a time (or if combined in a bowl, a little bit at a time), beating well after each addition and scraping the sides and bottom of the bowl often.
4. Add vanilla, lemon juice and orange zest. Mix to combine.
5. Gradually add the flour, mixing until just combined. You don’t want to over beat the dough—it should remain relatively loose and sticky so that you can pipe it out.
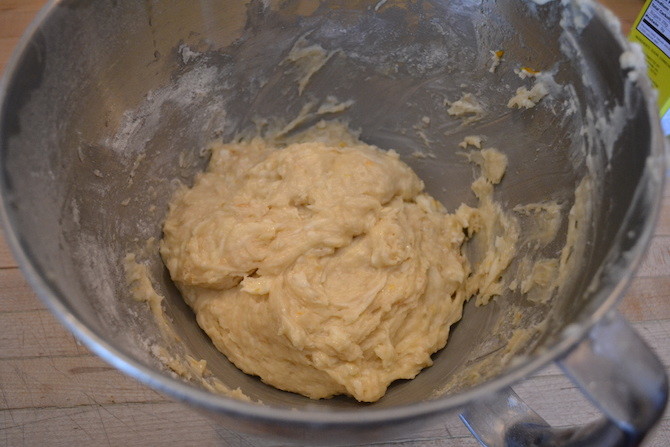
Photo by Rae Steinbach
6. Though optional, it’s advisable that you refrigerate the dough for at least 10 minutes to make handling it easier and for the cookies to flatten out less.
7. To get the dough into the piping bag, place it in a cup and fold the edges over the rim of the cup in order to form a container for the dough. You can also use a Ziploc bag for this step (a fabulously janky kitchen hack) and follow the same idea of having a cup as support for getting the dough into the bag. Check out this helpful Youtube tutorial for Ziploc magic:
8. Pipe dough onto the baking sheet in 1-inch wide, 2-inch long segments. Be sure to provide enough spacing between each piece of dough, about 2 inches, because it will spread as it bakes.

Photo by Rae Steinbach
9. Bake for 10-15 minutes, or until edges are golden-brown and center has set. If your piping skills are better than mine (they probably are), your cookies will turn out more uniform in shape. Otherwise, embrace the imperfections and realize they still taste damn delicious.
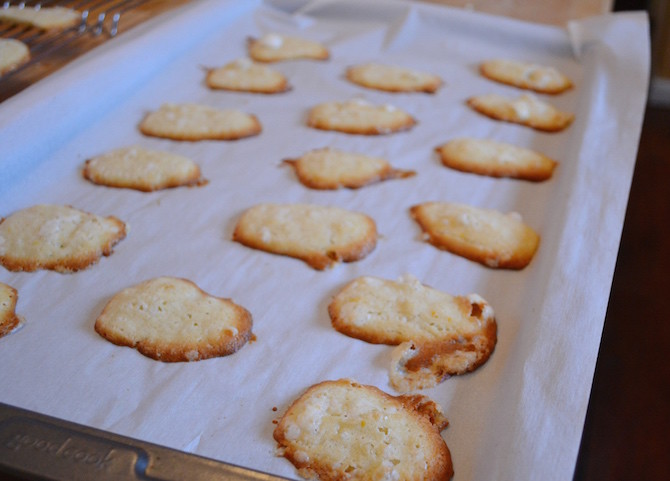
Photo by Rae Steinbach
10. While the cookies are cooling, make the ganache by placing heavy cream in a small saucepan over medium-low heat and placing chocolate in a bowl. Stirring often, heat the cream until it begins to simmer and steam but not boil, about 4 minutes. Remove from heat and pour over the chocolate in the bowl.
Note: If you don’t have heavy cream available or don’t feel like spending the time making this (but it’s worth it if you can), you can alternatively melt the chocolate in the microwave.
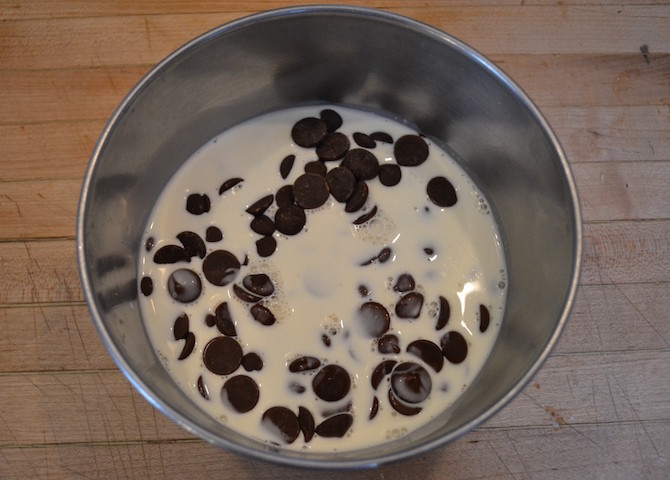
Photo by Rae Steinbach
11. With a fork or whisk, mix the cream and chocolate until chocolate has melted and the texture is smooth. Set the finished ganache aside to cool and thicken or stare deeply into its wondrous, chocolatey soul.
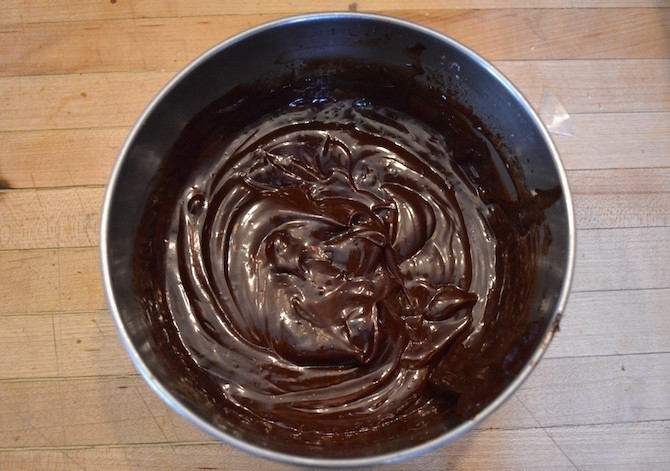
Photo by Rae Steinbach
12. Once the cookies have cooled, match them into pairs roughly according to size. These will be their sandwich pairs so you want them to be decent matches in terms of size and shape. Flip one cookie of each pair over to prepare for ganache-ing (aka applying the filling).
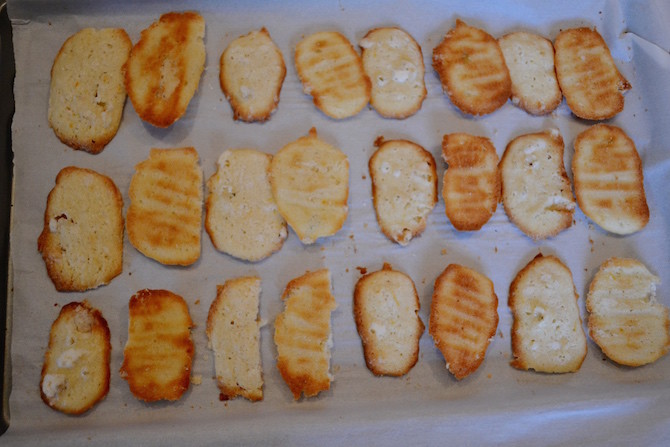
Photo by Rae Steinbach
13. Apply a thin-moderate layer of chocolate to each flipped half. Don’t overdo it on the filling, though, or it will ooze out of the sides of the sandwich once the other half is pressed on, which is very un-Milano like.
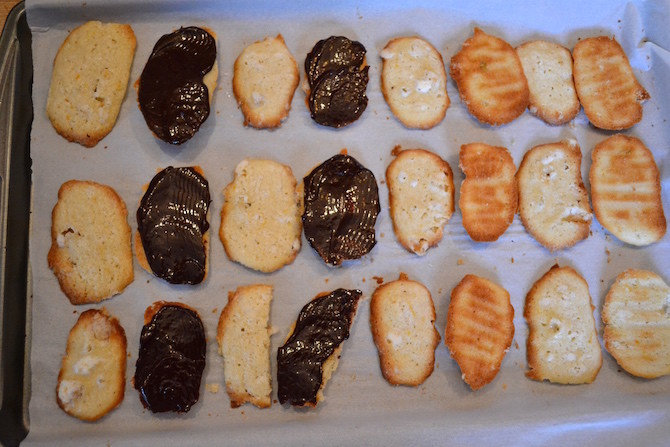
Photo by Rae Steinbach
14. Press the other half gently onto the chocolate-covered cookie and repeat for all pairs.

Photo by Rae Steinbach
15. Place in the refrigerator until filling has set.
16. For a fancy and classic presentation, place 1-2 Milanos in a white paper muffin liner. Now you’ve really outdone yourself—pat on the back to you.
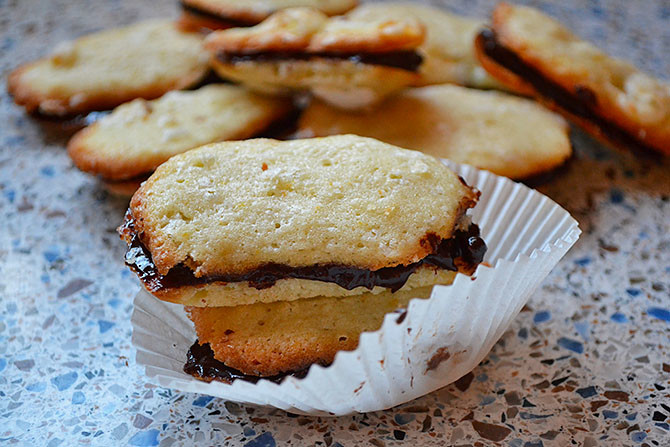
Photo by Rae Steinbach
Like this? We figured. Why don’t you pin it?
